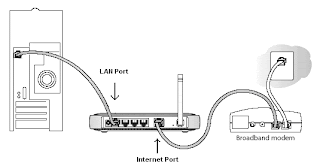
Netgear wireless devices are known to woo users for their networking and wireless capabilities, outstanding Wi-Fi range as well as excellent signal strength. That said, Netgear devices are one of the best choices for going wireless.
However, these devices are equally known to pose challenges like poor Wi-Fi signal strength, range, and intermittent connection among other Netgear router problems at times. Don’t worry! I'll discuss some great tips for your Netgear wireless router to help you fine tune it for the optimal results. You can save tremendous time using these tips and happily go wireless.
1. Positioning – It plays an extremely important role in having a good wireless range. Choose a location that is free of obstacles, electrical equipment like microwave ovens, fax machines, mobile phones, and computers etc. You can choose to place the router in the centre of a room or home for even and omni-directional range. You can also mount it on a wall that is empty of electrical, phone wires or metal objects as well as those mentioned above.

2. Point the antennas (of your Netgear router) upward in line as well as view of one another. If your router came without antennas, then buy one or two as per your choice from a third-party manufacturer.
If you are using an external antenna, then it is recommended to place it high as well as away from physical touch with equipment and obstructions etc. If there is a multistory building, then position it at least 45 degrees (or more) high from the ground.
3. Attach an Antenna – As said earlier, you can buy and attach an external antenna to your device in order to enhance the signal strength & range. Follow the instructions mentioned in the above step for the right positioning of the antenna.
4. Choose a strong channel – There are total of 11 channels (13 in Europe) for 802.11g and 802.11b wireless router versions. You can select any one of them for your Netgear device. 802.11g and 802.11b protocols just have three non-overlapping channels. Choose the channel number, which is not being used by anyone else in your neighborhood. Though it is practically impossible, but still options are there.
5. Attach a Powerline Extender – Buy a powerline extender from Netgear (it does offer these little, powerful gadgets) and plug it directly into your router with another end into a power outlet. The extender doesn’t require configuration and is low priced. It simply uses a power line to transmit signals instead of an Ethernet cable.
6. Upgrade Equipment – If your router is an old genius, then it is better to upgrade it. Old devices are prone to transmitting weak signals and thus making your wireless connection perform real slow and sluggish. Thus upgrade your Netgear device to a newer version. You can also visit Netgear’s official website for upgrade options and help.
***RangeMax products of Netgear come with multiple antennas and hence usually don’t pose such problems. Advanced users can also choose to setup their Netgear device as an access point, use a repeater, or site survey etc.