Tuesday, August 28, 2012

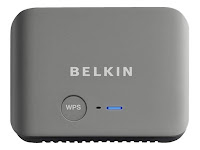
How to Reset Belkin Router to Factory Defaults

If you have lost track of your custom wireless configurations like SSID, wireless encryption key etc. or want to reset your login details to defaults, you can reset your Belkin router to factory defaults. Doing so will reset your custom Belkin router settings including login details to defaults.
Check the steps given below and hard reset your Belkin router:
1. Grab a sharp/thin pin or object and keep it aside.
2. Make sure that your Belkin router is powered on. Now locate the Reset button, a tiny hole at the back of the router. The button may also be located underside the router.
3. Take the sharp pin or object and insert it in the hole. Press and hold the button for 7-10 seconds and then release it.
4. The lights will flash and the Belkin router will reset to the factory defaults. Let the router reboot fully.
5. When done, you can set up your Belkin router. To do so, connect your computer directly to the Belkin router.
6. Open your web browser and type ‘192.168.2.1’ in the address bar. Hit Enter to continue.
7. Click the Login button and enter the default router password in the Password box. Click the Submit button. If you don’t know the password, check your Belkin router setup documents.
8. When logged in, set up your Belkin router, configure wireless settings or firewall, do port forwarding, or convert it into an access point etc. (See Also Reset Wireless Password)
***Most of the Belkin routers are shipped without any password. Hence the Password field is left blank if you are using the default password. However, you must always refer to your Belkin router support manual for more specific details.

Monday, August 27, 2012

How to Configure Firewall Settings in a D-Link® Router

Firewall is an integral part of any device and application like computer, router, antivirus etc. It helps keep unauthorized access at bay to and from your computer, wireless network etc. If you have a D-Link router, you can customize the firewall settings according to your wireless network or browsing needs. Check the steps given below and configure firewall settings in your D-Link router:
1. Connect your D-Link router directly to your computer using the Ethernet cable. When done, launch your web browser and type ‘192.168.0.1’ in the address bar. Hit Enter to proceed. On the D-Link Login screen, enter your router’s username and password. You may also be required to enter a capatcha depending on its model etc. (See also how to configure D-Link DL 524 Wi-Fi router)
2. If you don’t know the login details, refer to your D-Link router setup documents. If you changed login details and have forgotten or misplaced them, you can reset your D-Link router to factory settings and use the default login details. When logged in, click the Advanced tab> click Firewall Settings in the left hand pane. (See also wireless network support)
3. On the Firewall Settings screen, you can enable or disable SPI. Choose a NAT ENDPOINT FILTERING from UDP and TCP. If you want to protect your router and wireless network from spoofing, check the Enable anti-spoof checking box. You can check the Enable DMZ box if you are unable to access the Internet on a particular computer on your wired/wireless network.
4. You should enable the DMZ (Demilitarized Zone) option only if you cannot work out the Internet connectivity or browsing problem on that particular computer. The DMZ option will put this computer out of your wireless network and the router. (See also how to configure a D-Link Dir 655 Xtreme N Gigabit Router)
5. Under APPLICATION LEVEL GATEWAY (ALG) CONFIGURATION, you will find advanced settings viz. PPTP, VPN, RTSP, SIP etc. You can enable or disable these settings according to your wireless or port forwarding needs. When done, click the Save Settings button to save the changes. If prompted, reboot your D-Link router. (See also how to set up and secure a wireless router)

Friday, August 24, 2012

Connecting Two Linksys Wi-Fi routers for the Internet Access

Need help interconnecting 2 Linksys wireless devices for the Internet access all over your home or office? If yes, then this post is for you. You may want to set up and extend the range of your wireless connection to have Internet access all over your house or the area you are in. Check the steps given below and connect your two Linksys wireless routers for the same: (Also find here how to set up a Linksys router)
1. Connect your first Linksys router (the one that you want to use as the main\server router) to the PC using an Ethernet cable. Set up the router in a proper manner using the right cables. Now you need to configure the router. To do so, open your web browser and type ‘192.168.2.1’ in the address bar. Hit Enter to proceed.
2. On the router login screen, type the admin username and/or password and proceed. On the Linksys Setup utility, click the Wireless tab> the Basic Wireless Settings sub tab. Note down the Wireless Network Mode (mixed, g, or b whatever is there), Wireless Network Name (SSID), and other information on a piece of paper and keep it safe as it will be required in next steps. (Find here how to reset router password)
3. Click the Wireless Security sub tab> select Security Mode viz. WEP, WPA or WPA2> choose pre-shared passkey and type the desired password in the relevant filed. Note down all this information on a piece of paper and keep it aside for further use. Click the Save Settings button and exit the router’s interface.
4. Now connect the second router (the one that needs to be bridged with the server router) to the second PC using an Ethernet cable. Plug the power cable into the power outlet and boot the devices. When the devices have booted, login to the router’s interface (check first and second steps for more info). (Find here Linksys router support)
5. On the Linksys Setup screen, click the Setup tab> Basic Setup. Select the Disable button under Network Setup next to Network Address Server Settings (DHCP) to turn off the DHCP feature in this router. Since the server (main) device will be using this feature, it is not required to have it enabled in the bridge device.
6. Click the Wireless tab> Basic Wireless Settings. Select Client Bridge from the drop-down menu beside Wireless Network Mode. Match the settings on this tab to the settings in the server router. Now click the Wireless Security tab and ensure that all the setting match with those in the server router. (Find here how to set up a Linksys E1200 Wireless N Router)
7. Click the Status tab> Wireless> click the Site survey button to bring up the Site Survey dialog box. It will display a list of all the wireless networks it could find in the area. Locate your Wi-Fi network (SSID) and then click the Join button. Now open your web browser and check whether you can connect to the Internet or not. If you cannot, then review and match your settings exactly to those mentioned in this post. (Find here how to reset Router password)

Thursday, August 23, 2012

How to Upgrade Netgear Router Firmware

A firmware upgrade is the hardware upgrade for your Netgear wireless router intended to fix hardware issues, bugs etc. and enhance its performance, reliability, and lifecycle. Netgear rolls out firmware upgrades for each of its products time to time. So, if your Netgear router needs a firmware upgrade, check the steps given below and do so: (Also find here Netgear router support)
1. Before you begin, back up your wireless network configurations or settings before doing the firmware upgrade. Otherwise, all the settings will be lost and you will have to set up your wireless connection or access point from the scratch.
2. Close all the windows and open your web browser. Visit the official Netgear (worldwide) website and look through when the page loads up. Look for the Find your Product search box in the middle of the page and select your Netgear router model from the drop-down arrow.
3. If you don’t know the model number of Netgear router, refer to Netgear router setup documentation that was originally shipped with it. You can find the model number on your Netgear router itself. Turn it upside down and locate the model number. When done, repeat the first step.
4. Once you select your model number, you will be steered to another page showing the available downloads for it and general info etc. Under Downloads, click the available Firmware link and then click the Download Now button. (Find here Netgear wireless router problems and fixes)
5. If you see region-specific firmware downloads, select the one which applies to you and then proceed. Save the file to your PC and exit the browser window. Connect your Netgear wireless router directly to your computer with the Ethernet cable. (Troubleshoot Netgear wireless router)
6. When done, open your web browser and type ‘http://www.routerlogin.net’ in its address bar. Hit Enter to proceed. If prompted, enter login details and continue. On the Netgear Setup Wizard screen, click Router Upgrade under the Maintenance section (in the left hand panel).
7. When prompted, click the Browse button and locate the firmware file that you just downloaded from the Netgear website. Select the file and click the Upload button. If you see any warning, click OK or Yes to proceed. Wait while the firmware is being upgraded.
8. When done, click OK or whatever you see on the screen to proceed. Your Netgear router will reboot during this procedure. When done, log in to your Netgear wireless router or connect to your wireless network. Find here how to update Netgear device drivers.

Wednesday, August 22, 2012

How to Fix Internet Connectivity Issues in a Netgear Wireless Router

If you are unable to access the Internet wirelessly or the webpages don’t load up on your Netgear wireless router, you may not feel good. Your Netgear device may not connect wirelessly to the Internet because of several reasons. Check these steps mentioned below and troubleshoot Internet connectivity or browsing issues in your Netgear wireless router:
1. Check the ADSL or cable modem status light. If it is solid green, it indicates that your ADSL/cable modem has a good connection. If the light is off, check modem’s physical connection. You can refer to your modem user manual or wireless router support docs for the same.
2. Verify that the Internet light on your Netgear wireless router is solid or blinking green. It indicates a good connection and correct wiring. If the light is off, check the Ethernet wire’s connection between your modem and router. Refer to your Netgear router support docs for any assistance on the same.
3. When done, log in to the web interface of your Netgear device and check if it can obtain the IP address from your ISP or not. Open your web browser, enter ‘192.168.1.1’ in the address bar, and hit Enter. Enter the login details on the login screen and proceed. Click Router Status under Maintenance and check if you see your IP address.
4. If you see 0.0.0.0, the router is not obtaining the IP address. It can happen due to various reasons. Contact your ISP and ask for the details including username, password for PPPoE etc. and try to connect to the Internet again afterwards. If you are unable to browse the Internet, check a few more things. Configure DNS server settings in your Netgear device.
5. You may also need to configure the default gateway settings also. To configure your Netgear device as the default gateway, reboot your PC. When done, open Command Prompt, type ‘ipconfig/all’ and hit Enter. Check Default Gateway, it should be 192.168.1.1, your Netgear device’s IP address.
6. If you are still unable to browse the Internet, ping your router’s connection to the PC. Open Command Prompt, type ‘ping 192.168.1.1’, hit Enter. If your PC is receiving connection from your Netgear device, you will see a message like Reply from 192.168.1.1: bytes etc. If there is no connection, you may see the Request timed out message.
7. The Request timed out error can occur due to two things: (1). incorrect physical connection between your Netgear device and the PC or (2) incorrect wireless network setup & configuration. Recheck and correct the Ethernet connection between your PC and the Netgear device. Also reinstall the TCP/IP stack and update Netgear device driver software.
8. When done, check back if you can browse the Internet or not. If the problem persists, hard reset your Netgear wireless router and you will be done. Save your existing wireless network setup configurations and then perform a hard reset. That’s all you need to do.

Tuesday, August 21, 2012

Connecting a Dell Desktop to a Wireless Router

Wireless routers have given users freedom from wires. You can connect your Dell desktop or laptop to a wireless router and set up a home network for all your home or office computers. It will enable you to access wireless connection from any part of your home or office to share files or folders, music, games etc. In this post, I am going to discuss how you can connect your Dell desktop PC to your wireless router to enjoy the wireless connectivity.
Step 1
Before you begin, make sure that you have a Wi-Fi router and hi-speed modem to connect to your Dell PC. Besides, your Dell PC must have a wireless card, a.k.a adapter, to set up a wireless network via your Wi-Fi router. You can determine if your Dell PC is wireless-enabled or not by clicking the Start menu, right-clicking My Computer, and selecting Manage.
Step 2
Make sure that you are logged in with administrator privileges, failing to which won’t let you access Device Manager. In the Computer Management window, click Device Manager and you will see a list of devices listed there. Click Network Adapters and you will see you wireless network card. If it’s not there, you will need to install one on your Dell desktop. If there is one, you can connect to the wireless network. Exit all the windows for now.
Step 3
If you have windows 7 on your PC, click the Start button and type ‘devmgmt.msc’ in the Start Search field. Hit the Enter key. If prompted, enter you admin password, click Continue. In Device Manager, expand Network Adapters and check if you have a wireless adapter installed on your Dell computer or not. Do as instructed above.
Step 4
Now place your Wi-Fi router in a convenient location, which is free from obstacles and electricity wires other than your modem’s and computer’s. All the three devices must be in the reach of wall jacks, electricity outlets. Now connect your wireless router to your broadband modem using an Ethernet cable. Plug one end of the Ethernet cable into the Ethernet port of your modem and run its other end into the WAN (or WLAN) port of your wireless router.
Step 5
Plug your router and modem in their respective electricity outlets. Push the Power button on both the devices. Wait for the devices to boot up properly. Depending on your router model, it may not have a Power button. It simply has to be plugged in the PC and the modem. So, if your router doesn’t have a Power cord, don’t worry. Plug one end of the Ethernet cable into one of the four LAN ports of your router and run its other end into Ethernet port of your Dell PC.
Step 6
Turn on your Dell PC. Check that all the lights have lit up on the router and the modem. When done, check if you have a wireless router setup disk and insert it in the drive of your Dell PC. The wireless router installation wizard should automatically fire up. Follow the on-screen prompts, install the drivers etc. and set up a wireless connection. Note down your wireless network details like SSID, security key etc. on a piece of paper and keep it safe. You will need this information in the next steps to connect to your wireless network.
Step 7
You may remove the Ethernet cable from the back of your Dell PC and the router also to start using the wireless connection. Click the Open Network and Sharing Center icon in your system tray. You will see the available wireless networks. Click your wireless network name (SSID) and then click the Connect button. Make sure that the button beside Automatically connect to this network is checked. When prompted, enter your security key and click Connect. You will now be connected to your wireless network.
Step 8
If you are using Windows XP, click the Open Network Connections icon in your system tray> select View Available Wireless Networks. Click your SSID name (wireless network name) and click Connect. If prompted, enter your wireless security key and click Connect. Open your web browser and check if you can browse the Internet.
Step 9
Windows 7 or Vista generally does not generally need the wireless router setup disk for driver installation. Window 7 or Vista can automatically search for the drivers once you are online and prompt you to install them. Windows XP can also search for and automatically install the drivers when prompted. You can also manually update the drivers of your wireless adapter by downloading them from the Dell website.

Monday, August 20, 2012

How to Connect XBOX 360 to your Wireless Router

One of the main reasons why you use a wireless router is the wireless connectivity for all the present devices like computer, printer, gaming console, TV etc. in your house. Besides, you can share a single Internet connection on these devices for surfing the Internet, online gaming, sharing files etc. XBOX 360 is one such gaming device that if you have you will want it to connect to your wireless router for online gaming or streaming content etc. Check the steps given below and connect your XBOX 360 to your Wi-Fi router:
1. Before you begin, make sure that you have set up your wireless network and it is up and running. If you don’t know how to set up your wireless network, check this link http://www.vtechsquad.com/wireless-networking/. If you have a Netgear wireless router, check this Netgear router setup guide.
2. While you set up your wireless network, make sure that you note down all the details related to it. These include the wireless network (SSID) name, wireless security key etc. If you haven’t noted down these details, don’t worry. Click the Start button> Control PanelNetwork Center. It will show your network name, make a note of it.
3. You can now proceed to connecting your XBOX 360 to your router. Connect the USB adapter to the USB port located at the back of the XBOX 360. The adapter must have been shipped with the console. However, if it didn’t come with the console, then either buy it or contact Microsoft product support. Connect your console to the TV also using the cable that came with it.
4. Turn on TV and the console (if it was turned off while the connection was being made) and hit the silver color X button on the mouse controller to bring up the main menu. Click the Settings menu> select System Settings. Click the Network Settings link> Edit Settings.

5. Type the name of your Wi-Fi network (SSID) and then navigate to Network Mode. Set this option to Infrastructure. Click the Save Changes button and exit all the windows. Turn off and on XBOX 360 to let the changes take place. When done, turn on your XBOX 360, connect to your wireless network and get going!

***Find here how to secure your wireless network from being hacked.

Friday, August 17, 2012

How to Update Netgear Device Drivers

If you are experiencing problems with your Netgear router device, you can update its drivers. Drivers are the small software that ensure proper functionality and performance for a device. It is essential to update drivers of your Netgear device (in fact any device connected to your PC) regularly. Check the steps below and do so.
1. Log on with admin rights to your computer. Without admin rights, you can’t update drivers of your Netgear device. If you are using Windows XP, click the Start button> right-click My Computer> select Manage.
2. Click Device Manager to display the list of devices installed on your PC. Expand the Network adapters category. You will see your Netgear adapter there. Right-click on Netgear adapter, select Update Driver.
3. On the Hardware Update Wizard screen, click Yes, This time only and hit Next. Select the Install the software automatically (Recommended) option and click Next. Make sure that you are connected to the Internet; otherwise the updates will not go through. Wait while the installation goes through. When prompted, restart your PC.
4. For Windows 7, click Start> right-click Computer> select Manage. If prompted, enter you admin password and continue. On the Computer Management window, click Device Manager to display the devices listed here.
5. Expand Network adapters, right-click Netgear device and select Update Driver Software. On the next window, click Search automatically for updated driver software and follow rest of the prompts. Restart your PC when done.
6. Reconnect to your wired or wireless network on your Netgear device or access the Netgear router setup interface as desired. The device should work fine.

***You can find here Netgear router support for Netgear router problems.

Thursday, August 16, 2012

How to Troubleshoot Netgear Wireless Modem Hooked to PC

If you are experiencing problems with your Netgear wireless modem-cum-router hooked to your PC, you can troubleshoot and fix it. Depending on various things including your Netgear router setup, you may face such problems that call upon a need for troubleshooting and repair. Find here support for Netgear router problems. Check the steps below and troubleshoot your Netgear wireless device:
1. Reboot your PC, Netgear wireless modem-cum router, and/or router (if you have a third-party one) by turning them off and on. A simple reboot is observed to be the easiest and most effective method for making things work. Once the devices have booted up, recheck if you can connect to the wireless network and browse the Internet.
2. Alternatively, you can power cycle the devices by unplugging their power cords for 10-20 seconds. Plug the power cords firmly back in afterwards and wait for them to turn on. This should resolve any common issues that might have occurred due to sudden power outage that distorts the memory.
3. If the issue persists, update your Netgear device drivers. Open your web browser and visit the official Netgear website. Browse to the Product section, locate the model or version of your Netgear device, and download all the available updates. This will improve the functionality and performance of your Netgear modem.
4. If the problem lasts, click the Start button> Run. Type ‘cmd’ in the Open field> click OK. On the Command Prompt window, type ‘ping 192.168.0.1’ and hit Enter. Test ‘ping 192.168.1.1’ also to check if computer is making connection to the router.
5. Look carefully through the prompts that appear afterwards. If you see a prompt like Request timed out, it indicates that the modem has not been set up correctly. Enter the correct username and password to connect to the Internet. If you are not sure about this information, contact your ISP.
***Find here support for Netgear router problems.
6. The error message may also occur due to enabled proxies in your Internet Explorer browser. To disable the proxies, open the browser and navigate to ToolsInternet Options. Highlight the Connections tab> click the LAN Settings button. Remove check mark from the Use a proxy server for your LAN box. Click OK to exit LAN Settings. Click Apply and then OK to exit Internet Options. Clear the browsing history including cookies etc. and then reconnect to the Internet. It should work fine now.
7. If nothing so far has worked out, then hard reset your Netgear router-com-modem. To do so, take a thinner, sharper object and push it inside the Reset hole, located at the back of the router. Hold the button for 10-20 seconds or until you see the blinking power LED light and then release it. This will restore the router’s settings to factory defaults. You can use the default username and password that originally came with the router to login and reconfigure it.

Tuesday, August 14, 2012

How to Disable Netgear Configuration Assistant in Netgear Wi-Fi Router

It may happen that every time when you launch your web browser to browse the Internet, check emails, or do miscellaneous online activities, you may only see Netgear SMART WIZARD Configuration Assistant greeting you on the screen. This problem can occur due to enabled Configuration Assistant utility in your Netgear device or conflict between your web browser and the LAN proxy server. Check the steps below and fix this Netgear router problem:
1. Launch your web browser and it should immediately launch the NETGEAR SMART WIZARD Configuration Assistant screen. Otherwise, you can type ‘www.routerlogin.com’ in the address bar, hit Enter.
2. If the pop-up blocker is enabled, disable it. Besides, delete browsing history, cookies and temp files etc., and reset your browser to default settings. Do not forget to back up your toolbars or add-ins that you have on your browser.
3. When done, close the browser. Make a wired connection of your computer to your router using the Ethernet cable (if it’s a wireless one). Now open your browser again and type ‘www.routerlogin.com/CA_HiddenPage.htm’ in its address bar. Hit Enter to continue.
4. You will see the Configuration Assistant State page. Select the radio button beside Disable Configuration Assistant and click Apply. When done, exit this page and close your browser. Remove the Ethernet cord to make your computer wireless again (if applicable). Now launch your browser again to use it properly.
***Find here how to connect your gaming device wirelessly to your Netgear wireless router.

Monday, August 13, 2012

Setting Up a Netgear Wi-Fi Router

Netgear wireless router being one of the most popular wireless devices allows you to interconnect your PCs, laptops, peripheral devices, and several other devices etc. via wireless or home networking. It means you can share multiple media files or documents, do live streaming, browse the Internet, send/receive emails, or print documents etc. simultaneously. Check the given below steps and set up your Netgear wireless router.
Setting Up a Netgear Wi-Fi Router

Smart Wizard Installation Assistant Setup Method
Below steps will help you automatically perform Netgear router setup: 
  • Insert the ‘resource CD’ into your PC and wait for the response. The CD will auto-start itself and recognize your PC’s language viz. English or French etc. click on ‘Yes’ or ‘Ok’ to continue in the same language or change it if you want to.
  • Click ‘Next’ to proceed 
  • Click ‘setup’ to launch the Smart Installation Assistant  
  •  Follow rest of the instructions and the wizard would check your Internet connection, configure wireless network settings, and choose the optimum security level for your network.
Manual Setup Method
Below are the easy steps that will help you access Netgear router setup: 
  • Open your web browser. 
  • Type 192.168.0.1 or 192.168.1.1 in the address bar and hit ‘Enter’ on the keyboard. You will see a login screen. 
  • On the Login screen, enter your username and password. If it’s a new router, then the login information would the default one that came along with the router. If it’s an old router, then the information would be the configuration information that you entered while setting it up for the first time.
  • After logging in, you will see a Router Setup utility window. Follow the on-screen prompts and set up and configure your Netgear wireless router.
Once you have set up your router, you can use it for wireless or home networking, access point setup, wireless switch setup, or Firewall configuration etc.
***You can also find here support for Netgear router problems. Check here how to add Kindle Fire to your Netgear wireless router.

***You can also find here how to fix 'Common Netgear wireless router problems'.

Thursday, August 9, 2012

How to Use D-Link Wireless Bridge to Extend your Wired Network Range

If you want to extend the range of your wired network using your Wi-Fi router without suffering a cable mess, you can easily do it. What you need is a wireless bridge and your wireless router. A wireless bridge is designed to extend the range of your wired/wireless network by receiving signals from your wireless router and transmitting them to your wired devices like TV, gaming device etc. Here in this blog, I am going to discuss how you can use your D-Link wireless bridge with your D-Link wireless router to do so. Check the steps below:
D-Link Wireless Bridge to Extend your Wired Network Range
 Things you will need:
  • D-Link wireless router (WPS-enabled preferred)
  • D-Link Duo Wireless Bridge/Access Point
  • Ethernet cable if your router is not WPS-enabled
  • Wireless network details viz. SSID, network/security key etc.
Follow the steps given below to connect your D-Link Wi-Fi bridge to extend your Wi-Fi range:
1. First make sure that you have already set up your wireless network on your D-Link wireless router. Also, make sure that you are connected to your wireless network.
2. Now place your D-Link wireless bridge-cum-access point nearby your D-Link router and other wired devices. If you cannot place the wireless bridge near to your router, at least make sure that it’s within the range of your router’s signals and at least a cable’s length away from the wired devices.
3. Now connect your wireless bridge to your router. If your router is WPS-enabled (Wi-Fi Protected Setup), it will have a WPS button on it. Your D-link wireless bridge also has a WPS button. Press the button on your wireless bridge and on the router also to let each other communicate wirelessly.
4. If your D-Link router is not WPS-enabled, then use this method. Connect your wireless bridge to your computer using the Ethernet cable. When done, open your web browser and type ‘192.168.0.50’ or ‘http://dlinkap’ in its address bar. Hit Enter to proceed.
5. It will open your wireless bridge’s web configuration screen. Click the Setup tab and then click the Wireless Network Setup Wizard button. Follow rest of the on-screen prompts and complete the procedure.
6. Click the Finish button to finish the procedure and reboot the wireless bridge. When the bridge has booted up, pull out the Ethernet cable from it and the computer as well. When done, connect all your wired devices (directly) to the bridge using Ethernet cables.
7. You are done! Your D-Link wireless bridge will automatically connect your devices to your primary wireless network setup through D-Link router.

Wednesday, August 8, 2012

How to Obtain a Lost Network Key for a Belkin Wi-Fi Router

Do you want to regain access to a lost wireless network key for your Belkin router? A network key is the combination of numbers and letters that is used to connect to your wireless network. The hex key protects your Wi-Fi network from intrusion and unauthorized access. If you have lost your network key, check the steps below to obtain it again from your Belkin Wi-Fi:
How to Obtain a Lost Network Key for a Belkin Wi-Fi RouterOpen your web browser. Type ‘192.168.2.1’ in its address bar and hit Enter. When prompted, type the password and click Submit.
If you never created any custom password, leave the field blank and click Submit. It is because most of the Belkin devices are shipped without a default password. You can also refer to your router docs to check the login details.
When logged in, click Security under Wireless in the left hand panel. Remove checkmark from the box next to Obscure PSK. You can now see your key in the Pre-shared Key (PSK) box.
Note down the key and then recheck the Obscure PSK box. It will make your network key blur again to protect your privacy. Click the Apply Changes button and exit the router interface.
If you never changed your key, you might also find it in two other places viz. the wireless security card, which came with your Belkin router and the other one is the router itself. The security key comes printed on the product label’s top extreme right hand corner.
If you lost the login password of your router and are unable to login to view the key, then only a hard reset can help you reset the password and the network key. Find here how to reset your Belkin router to factory settings.
When logged in, navigate to Wireless> Security and make the desired changes. You can also generate a new key by typing a passphrase in the Passphrase box and then clicking the Generate button. You must note down this key as recommended above. Keep the paper piece in a safe and dry place where it is away from unauthorized reach.

***If you are unable to access your Belkin router's interface, make a wired connection between your computer and the Belkin router using the Ethernet cable. You can also find here how to secure a Belkin W-Fi router.

Tuesday, August 7, 2012

Securing your Wireless Network from being Hacked

Wireless routers have made our life simpler by bringing freedom from wires. We can share a single wireless connection on multiple PCs, placed all over a house or office, and enjoy browsing, emailing, music\video streaming, gaming etc. As the wireless technology has advantages, at the same time it has disadvantages too. A wireless connection (no matter whichever router you are using) can be taken undue advantage of by ill-will people. For them, hacking wireless network is just a child’s play. It can be scary but don’t worry! Check the below mentioned tips and safeguard your wireless network from hacking.
1. Wireless networks usually work on two types of encryption mode viz. WEP and WPA. WEP (wired equivalent privacy) is an old technique of wireless protection. It offers three types of encryption keys viz. 265-bits, 128-bits, and 64-bits. As said earlier, WEP is an older technique; it mostly supports old wireless router devices.
You can also find here how to set up and configure a Linksys Wi-Fi router.
2. Go to your router’s wireless configuration and encrypt the network using this mode. Make a long encryption key that is hard to remember. Never set your Wi-Fi to automatic connection. Make it ask for the manual connection that requires a key to connect every time. Write it down on a piece of paper so that it can be retrieved if you have forgotten.
3. WPA (Wi-Fi protected access) is the latest technique to use encryption on a wireless connection. The technique was designed to overcome the issues involved in WEP. The technique doesn’t support old routers and hence is not used as extensively as WEP. It is recommended to use WPA as it is securer than WEP. You must note it down on a piece of paper for future retrieval purposes.
4. Disable the DHCP function in your router. This will keep hackers away from your wireless network. Hackers otherwise will have to crack the TCP/IP parameters, IP address, and subnet mask etc. so as to get into your Wi-Fi.
5. Create a unique and individual SSID for each wireless access point. Disable the SSID broadcast if SSID is reachable. This will withhold the SSID from appearing in the list of available networks. However, you will still have access to the wireless service.
6. Install a free home network mapping tool that will regularly signpost you about the changes in your home network. An abrupt change will indicate that your home network is being targeted by hackers. Thus you can take corrective actions to stop it. There are various tools available on the Internet like Spiceworks etc.
7. Change or disable SNMP (simple management network protocol) settings. Hackers can use SNMP settings to crack into your Wi-Fi. Either modify both the public and private SNMP settings or disable them.
8. You can create an access list for enhanced security, provided that your router supports this. The list will enable you to decide which device has to be allowed to connect to your network access point.

***Check here how to connect your gaming device wirelessly to your Belkin Wi-Fi router. You can also find here how to reset Wireless router password or set up wireless connection.

Monday, August 6, 2012

How to Connect your Gaming Console Wirelessly to your Belkin Router

You love playing high-end online/offline games, streaming content from your computer to your PlayStation or Nintendo Wii, sharing files etc., we also do. Believe me, it’s an amazing experience to play games or share files wirelessly from any part of your home or office. You can also do that by connecting your gaming console to your Belkin wireless router for the same. Check the steps below:
Make sure that you have set up your wireless connection on your Belkin wireless router prior to wirelessly connecting your gaming console. If you don’t know how to set up your Belkin router for wireless connection, click here:
Once you are done setting up wireless connection, set up your gaming device if it’s not already set up. You can refer to the user manual of your gaming console if you need assistance in making the connection of it to your DSL modem and computer etc.
Then plug the gaming device to its respective power outlet. While you make connections, make sure that all the devices are unplugged from their respective power outlets. When done, turn on your gaming console and other devices also. Let them boot up properly.
When all the devices including the gaming device have booted up, turn on the computer or the gaming monitor to which to have hooked up your gaming device. Go to the program menu and select the desired options. We are taking the example of Sony PlayStation®3 here.
Turn on the monitor display and on the XMB® home menu, select Settings> Network Settings. Press the (X) button on the mouse> click the Wrench icon beside Internet Connection and then click Enabled on the screen.
Click Internet Connection Settings and then press the (X) button on the mouse. If prompted, click the Yes button to confirm the action. Select Custom on the screen and press the (X)button. On the Select a connection method screen, select Wireless and press the (X) button.
On the WLAN Settings screen, click Scan to let the console start looking for the available wireless networks. It may take some time. When done, select your wireless network (SSID) and hit the (X) button.
Select the encryption type and then press the (X) button on the mouse. If your wireless network is password-protected, it will ask you for the security key. Enter the security key and click Done or whatever option you see on the screen to proceed.
On the IP Address Setting screen, select an option from Automatic, Manual, or PPPoE and proceed. When done, press the (X) button to save your settings. When done, click the Test Connection button to test your wireless connection on your gaming device.
If you see ‘Succeeded’, exit the window. That’s it and you are now connected to your wireless network on your gaming console also. If you face problems, go back and verify all the settings. If you continue to face problems while making your gaming console wireless with your Belkin router, you can contact the Belkin support.