Linksys router is a great device for networking, connecting to wireless connection, or in terms of performance. The device allows configuration of different features like access point, Client Bridge, or repeater among others to help make the most out of a wired or or wireless connection. Access Point is one of such features that Linksys wireless router has. An Access Point is very useful in broadcasting wirelessly on a wired network or extending a wireless network's range. So, if you have two Linksys wireless routers, you can set either of them as an access point and get going. Have a glance at the steps below:
Things you will need:
a. Linksys router's login details viz. username and password
b. IP address
c. DHCP address
d. DNS address
e. Wireless network name (SSID)
f. Channel number
g. Security type (WEP or WPA)
h. Wireless encryption/security key
1. You will first need to find out the IP address and other configurations of your router. To do so, click Start and navigate to Run. Type ‘cmd’ (without quotes) in the Run window, click OK. This will bring up the Command Prompt window. Type ‘ipconfig’ and then hit the Enter key on the keyboard. Make a note of all the information like IP address, subnet mask, and DNS address etc. and keep it aside for use in next steps.
 |
| Yellow Ethernet Cable |
2. Now connect your computer directly to the Linksys router using an Ethernet cable. Disconnect the modem if it is connected in between as well as the network cable from your present network. Plug one end of the Ethernet cable into the back of the router’s 4 LAN ports and the other into the computer as shown in the pic
 |
| Linksys Router Login Page |
3. Open up Mozilla Firefox or Internet Explorer whichever web browser you have. Type ‘192.168.1.1’ (without quotes and as is) in the address bar and press the Enter button on the keyboard. You will see a login screen like this. Enter the username and password in the respective fields and click OK. The default username and password for Linksys routers are 'admin' and 'admin' or 'password' respectively. However, you must refer to your router docs before entering anything in the fields. The information may differ according to the router model.
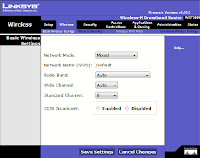
 4. When logged into the router setup utility, highlight the Wireless tab and then the Basic Wireless Settings. Check the Wireless Network Mode (it should be mixed or b or g). The Wireless Network Name (SSID) should be changed to something else that is hard to recognize but not Linksys. Change the channel number if you desire to. Wireless SSID Broadcast should be enabled.
5. Click the Wireless Security sub tab and change the configurations here too. Click on the drop-down menu next to Security Mode and choose WPA Personal. Assign a security key (pass code) in the WPA Shared Key box and then hit the Save Settings button.
6. Now click the Setup tab and navigate to Basic Setup. Under Network Setup, change the Local IP Address to something else other than the original IP address (which was there in the ipconfig information). Do the same with Subnet Mask, change it to something not similar to the original one.
7. Disable the DHCP Server by selecting the Disable button. The DHCP functionality is being disabled due to the fact that your other router will use DHCP addresses. Press the Save Settings button again to let the router reboot. If the router doesn’t reboot automatically, then do it manually. Reboot your computer and the other Linksys router also. Connect the network cable from your current network and restart your computer. Your router-computer connection should be like the one in the picture.
Now you can login to your latest wireless access point and go wireless.


No comments:
Post a Comment